


close
Choose Your Site
Global
Social Media
Views: 220 Author: Gill Transmission Parts Publish Time: 2026-09-22 Origin: Site


Content Menu
● What Is an Outboard Lower Unit?
● Rebuilding a Lower Unit: What It Means
>> Typical Lower Unit Rebuild Scope
>> When Rebuilding Is Usually a Good Choice
● Replacing the Entire Lower Unit Assembly
>> When a Complete Lower Unit Replacement Is Better
● Rebuilding vs Replacing: Side-by-Side Comparison
● The Four-Part Diagnostic Process
>> 1. Inspect the Gear Lubricant
>> 2. Conduct Pressure and Vacuum Testing
>> 3. Check Shaft Alignment and Propeller Damage
>> 4. Verify Internal Gear Condition
● Hidden Costs That Change the Decision
>> Rebuild Costs Often Overlooked
>> Replacement Costs Often Overlooked
● Fitment Is More Important Than Appearance
● Expert View: Choose Reliability, Not the Lowest Quote
● How to Extend Lower Unit Life
● FAQ
>> 1. Is it cheaper to rebuild or replace an outboard lower unit?
>> 2. Can a lower unit with milky oil be rebuilt?
>> 3. Does a bent propeller shaft require a complete lower unit replacement?
>> 4. What causes lower unit gear failure?
>> 5. How do I know whether I need new outboard gears?
>> 6. Can I install a replacement lower unit myself?
>> 7. What information is needed to order a replacement lower unit?
When an outboard begins to make noise, shift poorly, leak gear lubricant, or show milky oil, owners often face one expensive question: should you rebuild the lower unit or replace the entire assembly? The right answer depends on the real failure condition—not simply the age of the engine or the initial price of parts.
For boat owners, repair shops, distributors, and marine equipment buyers, the lower unit is a precision drivetrain. It transfers engine power through the driveshaft, forward and reverse gears, clutch dog, propeller shaft, bearings, seals, and gearcase housing. A small seal leak can sometimes be repaired economically. A cracked housing, damaged gear set, or bent shaft may make a complete lower unit replacement the more reliable long-term option.
At Ningbo Gill Transmission Parts Co., LTD., we have spent 29 years developing, manufacturing, and supplying outboard gears, lower unit components, and marine transmission parts. From our experience with gear systems and replacement parts, the best decision begins with accurate diagnosis, fitment verification, and a realistic comparison of lifecycle cost.

An outboard lower unit—also called a gearcase, gear housing, or lower unit assembly—is the underwater portion of an outboard motor. It converts the vertical rotation of the driveshaft into horizontal rotation at the propeller shaft.
Its major components typically include:
- Driveshaft
- Pinion gear
- Forward gear
- Reverse gear
- Clutch dog
- Propeller shaft
- Bearings and bearing carriers
- Propeller shaft seals
- Driveshaft seals
- Shift shaft and shift components
- Water pump housing and impeller
- Gearcase housing
- Skeg and anti-ventilation plate
Because this assembly operates underwater, it faces a demanding environment. Saltwater corrosion, fishing line, impact with submerged objects, contaminated lubricant, overheating, and poor installation can all shorten lower unit service life.
A lower unit should never be evaluated based on one symptom alone. Milky gear oil, metal debris, gear noise, oil leaks, or hard shifting are warning signs—not final diagnoses.
Rebuilding a lower unit means disassembling the existing gearcase, inspecting every internal component, replacing damaged or worn parts, reassembling the unit to specification, and testing it before return to service.
A proper outboard lower unit rebuild is far more than changing seals. It may involve replacing gears, bearings, shims, thrust washers, clutch dogs, propeller shafts, driveshafts, bearing carriers, and water pump components.
The exact work depends on the diagnosis, but a professional rebuild often includes:
1. Removing the lower unit from the outboard.
2. Draining and inspecting the gear lubricant.
3. Checking the drain plug magnet for metal particles.
4. Pressure-testing and vacuum-testing the gearcase.
5. Removing the propeller shaft assembly and bearing carrier.
6. Inspecting forward, reverse, and pinion gears.
7. Measuring shaft straightness and checking spline condition.
8. Replacing worn bearings, seals, O-rings, and gaskets.
9. Inspecting the clutch dog and shift mechanism.
10. Checking gear backlash, contact pattern, and shim stack.
11. Rebuilding or replacing the water pump components.
12. Filling with the specified gear lubricant and conducting a final leak test.
This approach retains the original housing and reuses only the components that remain within acceptable condition.
Rebuilding a lower unit is often the sensible option when the damage is limited and the gearcase housing is sound.
A rebuild may be appropriate when:
- Gear oil is milky, but internal gears have not yet suffered serious corrosion or pitting.
- Fishing line has damaged a propeller shaft seal, causing water intrusion.
- The lower unit has a minor oil leak around a seal, drain screw, vent screw, or bearing carrier.
- The propeller shaft is in good condition and has no measurable bend.
- The gears show normal wear but no chipped teeth, excessive pitting, or heat damage.
- The gearcase housing has no crack, deep impact damage, or distorted bearing bore.
- Genuine-quality or properly engineered replacement components are readily available.
- A skilled marine technician can complete the rebuild with the correct tools and measurements.
For example, fishing line wrapped behind the propeller can cut the propeller shaft seal. If the issue is found early, the repair may be limited to seals, lubricant, inspection, and possibly a water pump service. In that situation, replacing the entire assembly could be unnecessary.
Yamaha advises owners to inspect the lower unit exterior, remove the propeller to check for fishing line and debris, and inspect gear lubricant condition. Milky lubricant indicates water intrusion, while large metal chips may signal internal damage requiring deeper evaluation.
Replacing the entire assembly means removing the damaged gearcase and installing a complete replacement lower unit. Depending on the product, the replacement may be new, remanufactured, aftermarket, or a used original-equipment unit.
A complete replacement usually includes the main gearcase housing, internal gears, shafts, bearings, seals, shift components, and sometimes water pump parts. However, package contents vary. Buyers should never assume that every lower unit assembly includes the same accessories.
A full replacement is often the more dependable choice when damage is widespread, structural, or difficult to verify after repair.
Consider replacing the entire lower unit when:
- The gearcase housing is cracked, heavily corroded, or badly damaged by impact.
- The skeg, bullet, bearing carrier bore, or mounting area is distorted.
- The driveshaft or propeller shaft is bent.
- Gear teeth are chipped, broken, severely pitted, or blue from overheating.
- The clutch dog and gear engagement surfaces are badly rounded or damaged.
- The unit has run for a prolonged period with water-contaminated lubricant.
- Multiple internal components require replacement at the same time.
- The repair cost approaches the installed cost of a quality complete assembly.
- The boat is used commercially, seasonally, or in remote areas where downtime is expensive.
- The existing lower unit has an uncertain repair history or repeated failure record.
A propeller strike is a classic example. Even when the propeller appears to absorb most of the impact, the shock can bend the propeller shaft, damage gears, stress bearing surfaces, or crack the housing. Replacing only one visible damaged part may not restore long-term reliability.
| Decision Factor | Rebuild the Lower Unit | Replace the Entire Assembly |
|---|---|---|
| Initial cost | Often lower for seal, bearing, or limited gear repairs | Usually higher upfront |
| Cost predictability | Can change after teardown reveals hidden damage | More predictable when the assembly is correctly specified |
| Downtime | Depends on inspection, parts availability, and technician workload | Often faster if the correct assembly is in stock |
| Best for | Isolated wear, seal leaks, serviceable housing, limited internal damage | Severe impact, cracked housing, multiple failed parts, major shaft or gear damage |
| Housing condition | Existing housing must be structurally sound | New or replacement housing eliminates concerns about the old one |
| Internal component condition | Depends on what can be reused safely | Most internal components are renewed as part of the assembly |
| Fitment risk | Lower if original housing and configuration are retained | Requires careful verification of model, horsepower, shaft length, gear ratio, and spline details |
| Long-term confidence | Strong when rebuilt by a qualified technician with quality parts | Strong when the assembly matches the engine and comes from a reliable supplier |
| Environmental benefit | Reuses serviceable housing and components | May reduce repeated repair cycles if the old unit has extensive damage |
| Warranty coverage | Varies by repairer and components used | Depends on supplier, assembly type, and installation conditions |
The key comparison is not "repair cost versus replacement price." It is total cost of reliable operation.
A cheaper rebuild becomes expensive if it requires repeated removal, lost boating time, additional labor, or a second failure. On the other hand, a complete lower unit replacement can be unnecessary if the existing gearcase only needs seals, bearings, and careful service.
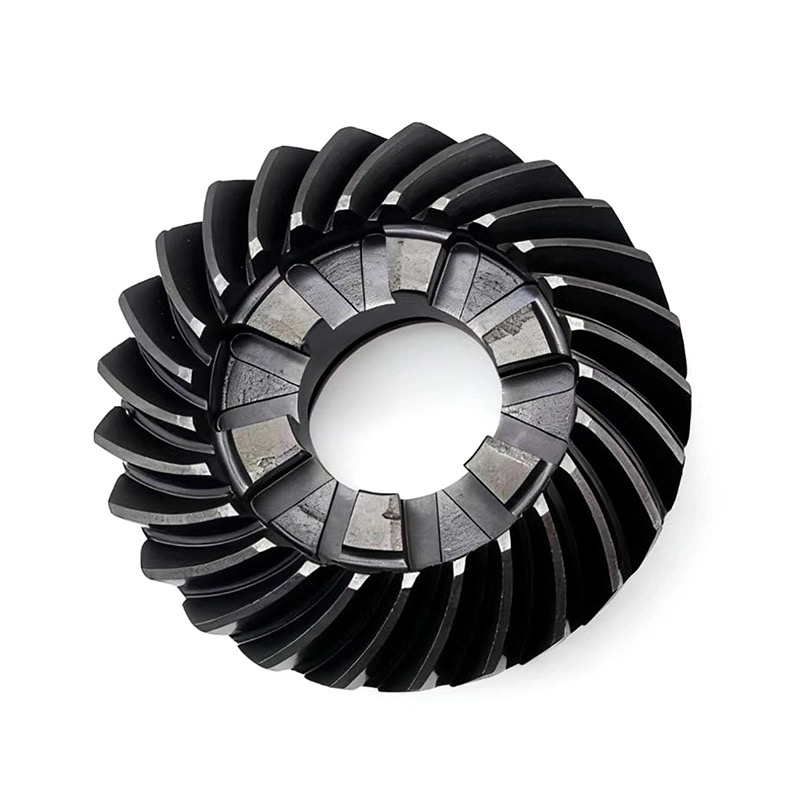
Before choosing a repair path, follow a systematic inspection process. This reduces guesswork and helps avoid ordering the wrong parts.
Drain a small sample of lower unit lubricant into a clean container.
Look for:
- Milky or creamy lubricant, which can indicate water intrusion.
- Burnt smell, which may indicate overheating or excessive friction.
- Fine metallic dust, which can be normal in small amounts.
- Large metal chips or fragments, which may indicate gear, bearing, or clutch-dog damage.
- Rust-colored contamination, which can suggest prolonged moisture exposure.
Yamaha states that fine metal dust on a magnetic drain screw may be normal, but larger metal chips in the oil or on the magnet should trigger professional inspection for internal damage.
A pressure and vacuum test is one of the most valuable checks before rebuilding or replacing a lower unit.
This test can help identify leaks around:
- Propeller shaft seals
- Driveshaft seals
- Shift shaft seals
- Drain and vent screw washers
- Bearing carrier seals
- Gearcase seams or cracks
Do not treat a seal replacement as a complete solution until the housing passes a leak test. A worn seal may be the visible problem, but corrosion, a damaged shaft surface, or a cracked housing may be the underlying cause.
Remove the propeller and inspect the shaft area carefully.
Warning signs include:
- Propeller wobble
- Visible shaft runout
- Oil around the propeller hub
- Fishing line behind the thrust washer
- Damaged splines
- Corrosion around the bearing carrier
- Vibration after a propeller strike
A bent propeller shaft can quickly damage new seals. Installing fresh seals without correcting shaft runout can create another water-intrusion failure soon after the repair.
If lubricant contamination, noise, shifting trouble, or impact history suggests internal damage, disassemble the gearcase for inspection.
Focus on:
- Gear tooth contact surfaces
- Chipped or pitted gear teeth
- Bearing race condition
- Clutch dog engagement corners
- Shift cradle wear
- Thrust washer condition
- Pinion gear damage
- Bearing carrier integrity
- Gearcase bearing bores
A gear set is a matched operating system. Replacing one visibly damaged gear while ignoring mating gear damage, incorrect shimming, or worn bearings can shorten the life of the repair.
The decision becomes clearer when buyers include the costs that do not appear on the first quote.
- Teardown labor
- Cleaning and corrosion removal
- Gear and bearing measurements
- Seals, gaskets, O-rings, and shims
- Water pump service
- Replacement shaft or carrier costs
- Reassembly labor
- Pressure testing
- Reinstallation and sea trial
- Delays caused by unavailable components
- Correct model identification
- Shaft length and gear ratio verification
- Transfer of external components, if required
- New water pump or mounting hardware
- Gear lubricant and sealing washers
- Installation labor
- Propeller compatibility confirmation
- Shipping cost for a heavy assembly
- Core return requirements, if applicable
A complete lower unit can look expensive until a rebuild requires a gear set, bearings, seals, a propeller shaft, a driveshaft, a bearing carrier, and extensive labor. At that point, the replacement assembly may offer better value and lower operational risk.
One of the most common procurement mistakes is purchasing a lower unit because it "looks the same." Visual similarity does not guarantee interchangeability.
Before buying a replacement lower unit or internal outboard gears, verify:
- Manufacturer and engine family
- Model number and serial-number range
- Horsepower rating
- Engine year or production range
- Shaft length
- Gear ratio
- Driveshaft spline count and diameter
- Shift shaft design
- Water pump configuration
- Exhaust housing interface
- Propeller shaft spline specification
- Trim-tab and anode arrangement
- Rotation direction, where applicable
For marine parts distributors and repair businesses, this information should be collected before quotation. A mismatch can cause installation problems, incorrect propeller speed, poor shifting, cooling-system issues, or premature gear failure.
When replacing a gearcase, the installation process typically involves removing the propeller and cowling, disconnecting the shift rod, draining lubricant, aligning the driveshaft and shift linkage, installing the water pump components, securing the gearcase, filling it with gear lubricant, and completing a sea trial.
From a marine transmission manufacturing perspective, the best decision depends on the condition of the housing, gears, shafts, bearings, and sealing surfaces as one system.
A lower unit rebuild is a technical repair. It requires clean assembly conditions, accurate shim selection, correct bearing preload, suitable sealing practices, and proper gear contact. A complete assembly replacement is a product-selection challenge. It requires exact fitment, reliable manufacturing quality, and correct installation.
Neither option is automatically better.
Choose a rebuild when the gearcase is structurally sound and damage is isolated, measurable, and economically repairable.
Choose a replacement assembly when the failure involves major impact damage, widespread internal wear, cracked housing, shaft damage, or a repair cost that no longer makes commercial sense.
For high-use vessels, charter operations, workboats, and export fleets, downtime has a real financial cost. In these cases, a correctly matched complete lower unit may be the more practical choice even when a rebuild is technically possible.
Prevention is far less costly than a major gearcase repair.
- Change lower unit lubricant at the engine manufacturer's recommended interval.
- Check lubricant condition before and after long storage periods.
- Remove the propeller periodically and inspect for fishing line.
- Replace drain and vent screw sealing washers when servicing lubricant.
- Address gear oil leaks immediately.
- Inspect the propeller after grounding or impact.
- Avoid continuing to operate with abnormal vibration, grinding, or difficult shifting.
- Use the correct marine gear lubricant for the engine.
- Service the water pump and impeller at the recommended interval.
- Confirm that replacement outboard gears and components match the original specification.
Yamaha recommends changing lower unit lubricant after the first 20 hours on a new outboard and then every 100 hours thereafter, while also replacing drain and vent screw crush washers during service.
Rebuild the lower unit when the housing is intact, the gears and shafts remain serviceable, and the problem is limited to seals, bearings, or a manageable group of internal components.
Replace the entire assembly when there is structural damage, repeated failure, extensive water contamination, major gear damage, bent shafts, or uncertain repair economics.
The most reliable next step is to document the engine model, serial range, horsepower, shaft length, gear ratio, and failure symptoms before sourcing components. Then evaluate the unit through lubricant inspection, pressure testing, shaft checks, and internal inspection where necessary.
Ningbo Gill Transmission Parts Co., LTD. supports marine parts buyers with experience in outboard gears, lower unit transmission components, and customized marine replacement solutions. If you are comparing a lower unit rebuild with a complete assembly replacement, contact our technical sales team with your engine details, part photos, and required specifications. We can help you identify the appropriate replacement gears, shafts, seal-related components, or lower unit solution for your application.
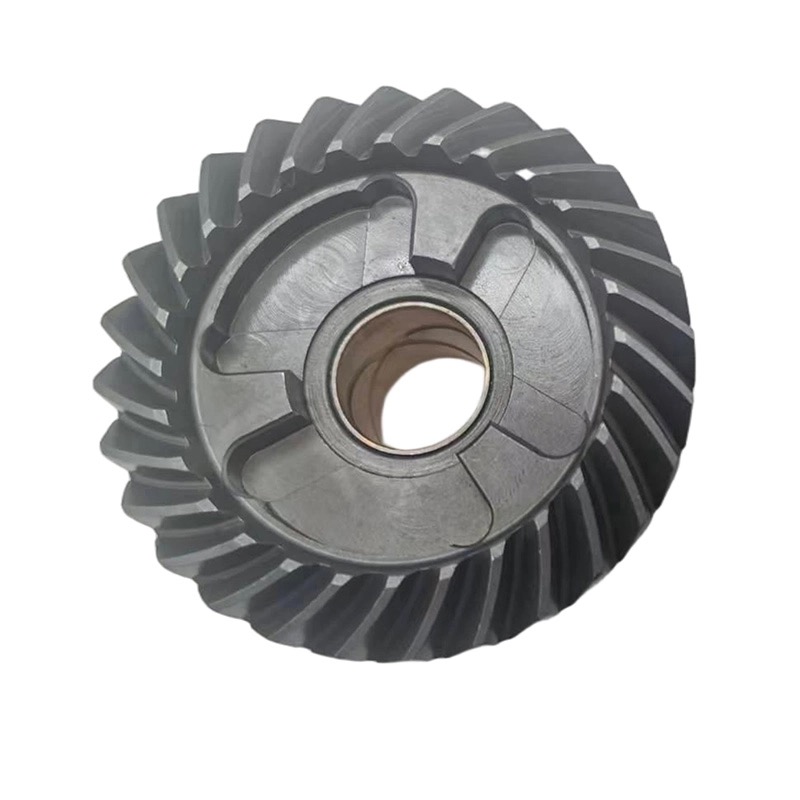
A rebuild is often cheaper when damage is limited to seals, bearings, or a small number of internal components. Replacement can become more economical when the gearcase needs multiple gears, shafts, bearings, seals, and significant labor.
Yes, in many cases. Milky gear oil indicates water intrusion, but the lower unit may still be repairable if the problem is discovered early and internal gears, bearings, and shafts remain in acceptable condition. Pressure testing and internal inspection are necessary before making the decision.
Not always. Some lower units can be rebuilt with a replacement propeller shaft if the housing, bearing carrier, gears, and other components remain undamaged. However, a severe impact may also damage the housing or gears, making a complete assembly the safer choice.
Common causes include water-contaminated lubricant, failed seals, fishing line damaging propeller shaft seals, impact with debris, low lubricant level, incorrect shimming, bearing failure, corrosion, and continued operation after abnormal noise or shifting problems.
Large metal fragments in gear lubricant, grinding noise, popping out of gear, hard shifting, damaged gear teeth, or visible pitting can indicate the need for new gears. A technician should inspect the full gear set and related bearings before replacing individual components.
Experienced technicians may install a lower unit with the correct service information, tools, torque specifications, lubricant, and fitment data. However, incorrect shift linkage adjustment, driveshaft alignment, water tube connection, or gearcase installation can cause serious damage. Professional installation is recommended when there is uncertainty.
Provide the outboard manufacturer, model number, serial number, horsepower, production year or range, shaft length, gear ratio, driveshaft spline specification, and clear photos of the existing lower unit. This information helps prevent costly fitment errors.
1. [Yamaha Outboards — Lower Unit Maintenance]
2. [Boating Mag — Replacing an Outboard Lower Unit Gearcase]
3. [American Boat & Yacht Council — Boat Design, Construction and Repair Standards]
4. [NMMA — Updated Boat Building and Repair Standards]
5. [SeaSierra — Outboard Lower Unit Leak: Finding and Fixing the Source]
6. [Yamaha Outboard Maintenance — Guide to Yamaha Lower Unit Maintenance]


